• Home
  • Bake+Cook
  • DIY
  • House
  • Beauty+Style
  • Travel
  • LOVING
Menu

t o u c h e s o f b l u s h

  • Home
  • Bake+Cook
  • DIY
  • House
  • Beauty+Style
  • Travel
  • LOVING
IMG_1840.JPG

Carrot Apple Muffins with Brown Butter Glaze

November 20, 2017
IMG_1828.JPG
IMG_1827.JPG

I am not a huge muffin girl unless they are obscenely moist. These are just that and have the best holiday flavor. These are definitely going into regular rotation in our house!

Yield: 12 muffins Total time: 35 min

  • 2 cups all purpose flour
  • 1 tablespoon baking powder
  • 1/4 tsp salt
  • 2 tsp cinnamon
  • 1/2 tsp ground nutmeg
  • 1/2 cup vegetable oil
  • 1 cup packed brown sugar
  • 2 large eggs
  • 2 tsp vanilla extract
  • 1/2 cup milk
  • 1 1/4 cup grated apple
  • 1 1/4 cup grated carrot

Brown Butter Glaze:

  • 4 tablespoons butter
  • 1 1/2 cups powdered sugar
  • 1 teaspoon vanilla extract
  • 3 or 4 tablespoons milk

Instructions

  1. Preheat oven to 375˚
  2. In a large mixing bowl, mix together the flour, baking powder, salt, cinnamon, and nutmeg.
  3. In a separate mixing bowl, mix together the oil, brown sugar, eggs, vanilla, and milk. 
  4. Gently fold the dry mixture into the wet mixture followed by the shredded carrots and apple. Be careful to not over mix. 
  5. Spoon the batter into the muffin pan lined with muffin liners. Fill to the top to get that nice muffin mound shape once baked.
  6. While the muffins are baking, melt 4 tablespoons of butter in a pan. Stir regularly to avoid burning the butter. Melt until the butter turns a nice golden color. Pour into a bowl and whisk in the powdered sugar, vanilla and milk. Set aside. 
  7. Bake muffins until the toothpick comes out clean, about 20 minutes. Remove from muffin pan immediately to a cooling rack. 
  8. Once the muffins are completely cooled, drizzle with brown butter glaze and serve. 
IMG_1837.JPG
IMG_1835.JPG
IMG_1832.JPG


Comment
IMG_1005.JPG

Our Kitchen Remodel

November 6, 2017

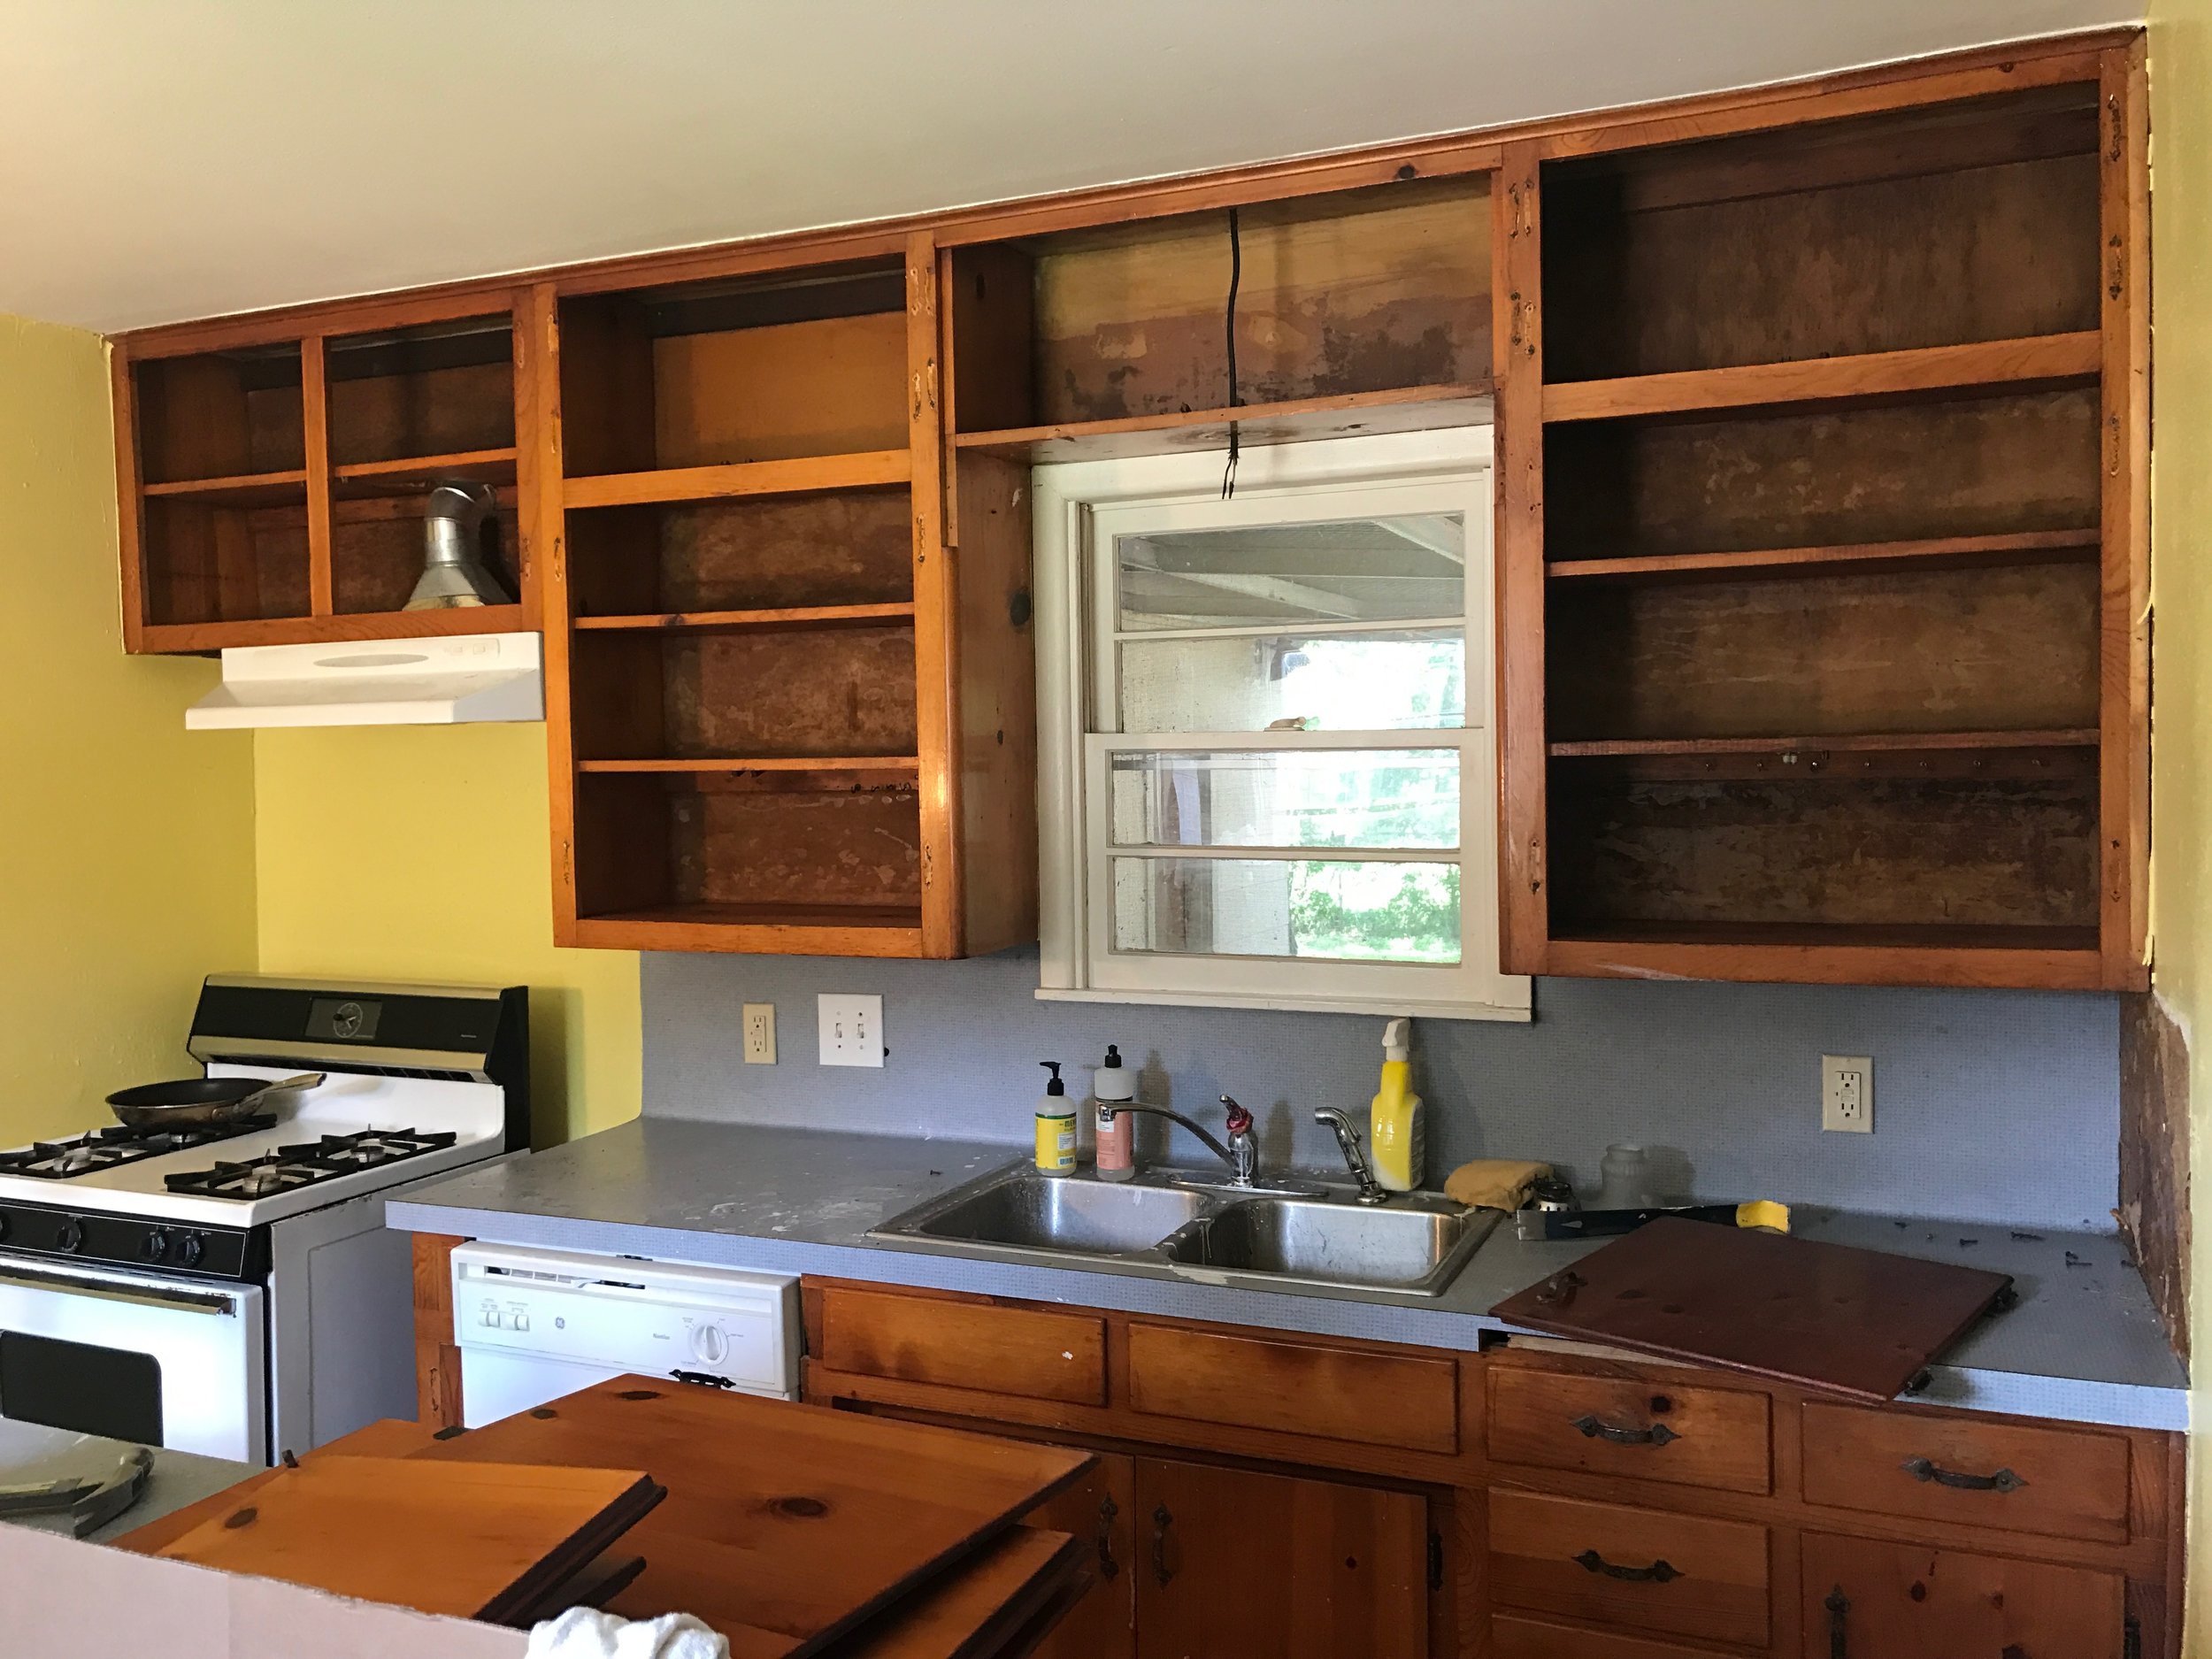
When we bought our home I came to a realization about how how naive I was. I saw our kitchen and saw the island and thought, “Oh wow this kitchen remodel is going to be so cheap! We will just paint the cabinets and, like, get marble counters and new floors -it will be so easy!” WRONG. When we moved in we learned really fast that our kitchen was disgusting and that it needed a full gut job. Nathan and I truly couldn't use it because it was that gross. The previous owners did not care about this house at all. They rented it out to a sweet family who ran it into the ground in every way possible. It was the worst case scenario. We discovered rats were coming in through a giant hole under the sink and ruling the kitchen at night. They were ripping apart the trash, hoarding dog food, and going to the bathroom in the kitchen walls. Naturally, I was beyond disgusted and felt sooo uncomfortable. Because of this, I obviously knew that we couldn't just go in halfway, we needed to address the kitchen head on. 

I quickly learned that if the bones aren't there you can't go in half-assed. This means if your cabinets aren't good cabinets, you cannot just paint them and put a several thousand dollar countertop on top of them! You really aren't doing anything for the value of your home or creating a long term solution. If the cabinets suck, replace them. If you cannot afford to, it’s really worth saving and waiting for. This goes for every aspect of the remodel! Keep what you can but don't keep what’s not worth keeping just to save a few bucks. YOU WILL have to spend it down the road. My silly notion that we could simply spruce up the eye sores could not be more wrong.


Keep reading to get all of the sources! 

This is what we planned to do:

Tear down wall separating kitchen and dining

New floors

Resurface walls

New cabinets

New appliances

New counters

New lighting

Now things are about to get really real. Here are the before pictures...brace yourself. 

IMG_7683.PNG

Here she is people. What I thought was an easy fix- hahahahahah! 

36426076-4D5C-4D31-B746-9241A69B6883.JPG
FullSizeRender.jpg.jpeg

A packrat had made a nest in our stoves vent. Not only is this disgusting its a HUGE fire hazard. 

IMG_1411.JPG

Since we were going to be ripping out every last part of the kitchen we decided to remove the wall separating the dining room. Let me tell you, its not as easy as fixer upper makes it look like it is. This was a few day project that included tons of dust and stress. 

IMG_1011.JPG

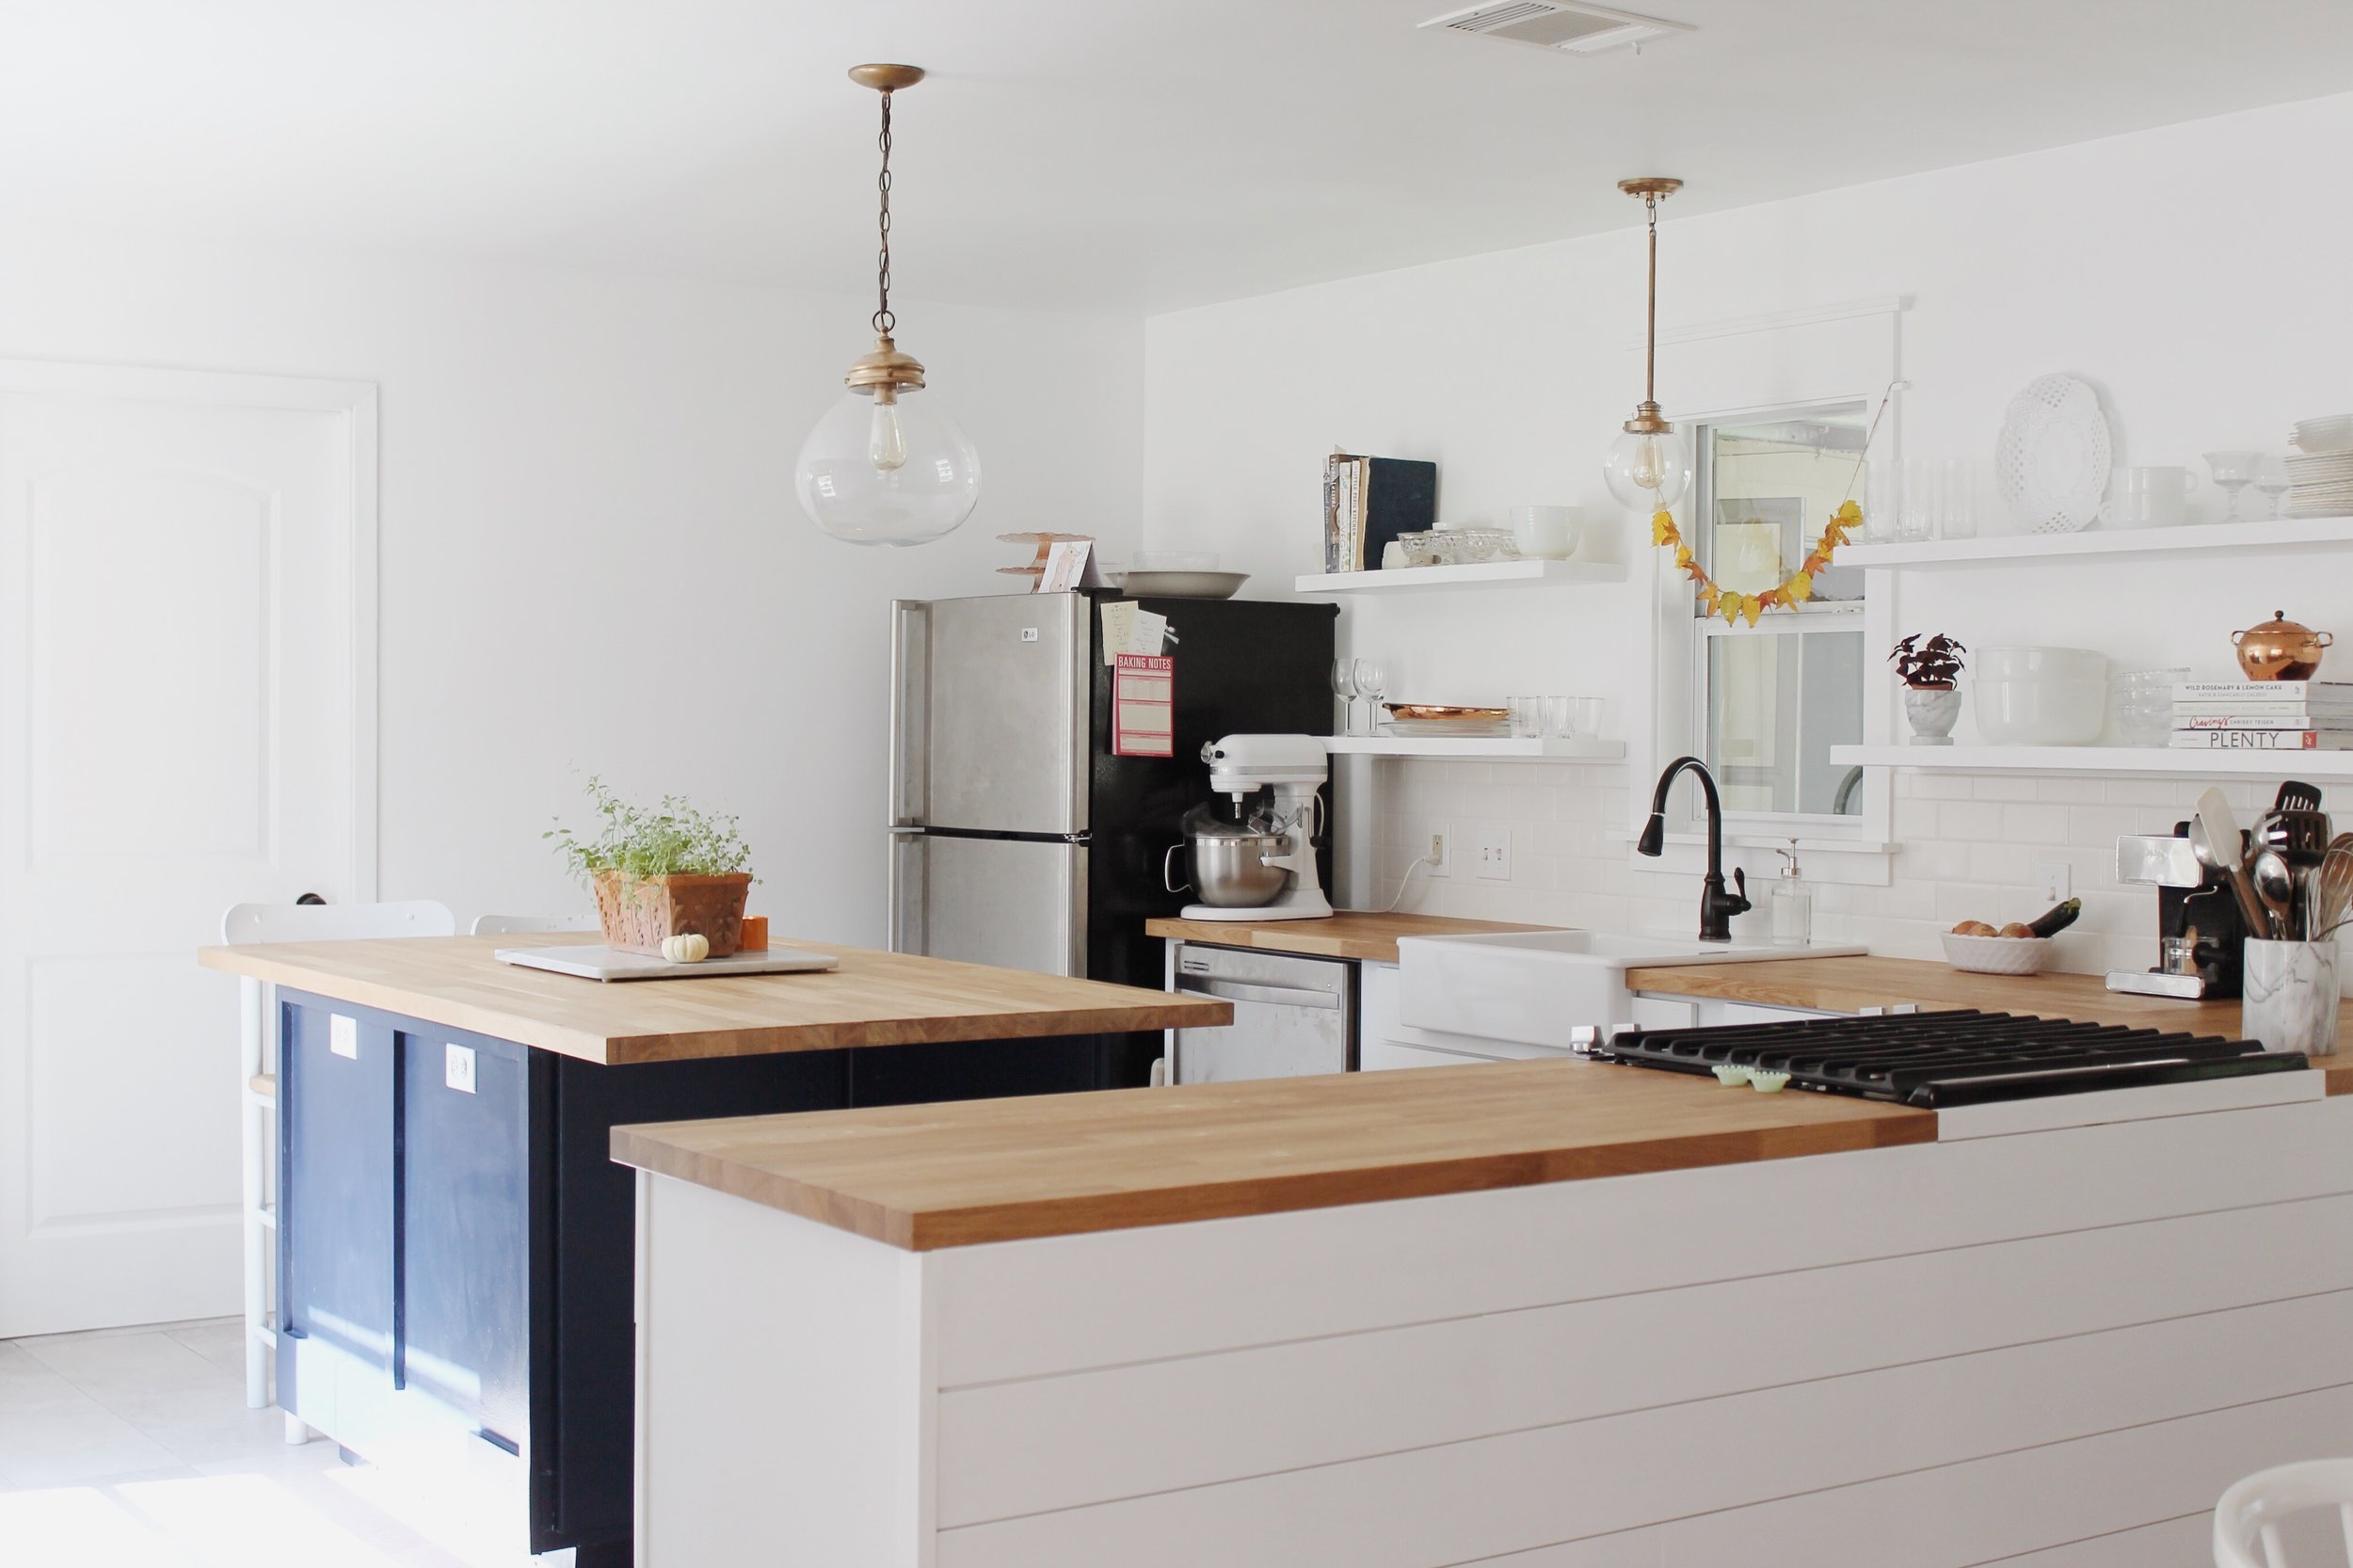
We decided to put up a half wall to give us more counter space, storage, and more appropriate home for the stove. I really want to build a case around the fridge. That is another project for another day! 

IMG_1004.JPG
IMG_1007.JPG
IMG_1010.JPG

Being able to cook and look into the dining and living room has always been a dream of mine. I love being able to make dinner while still being connected with Nathan! 

IMG_1012.JPG
IMG_1009.JPG
Something that really sold me on this house is all of the windows! 

Something that really sold me on this house is all of the windows! 

IMG_1044.JPG
IMG_1027.JPG
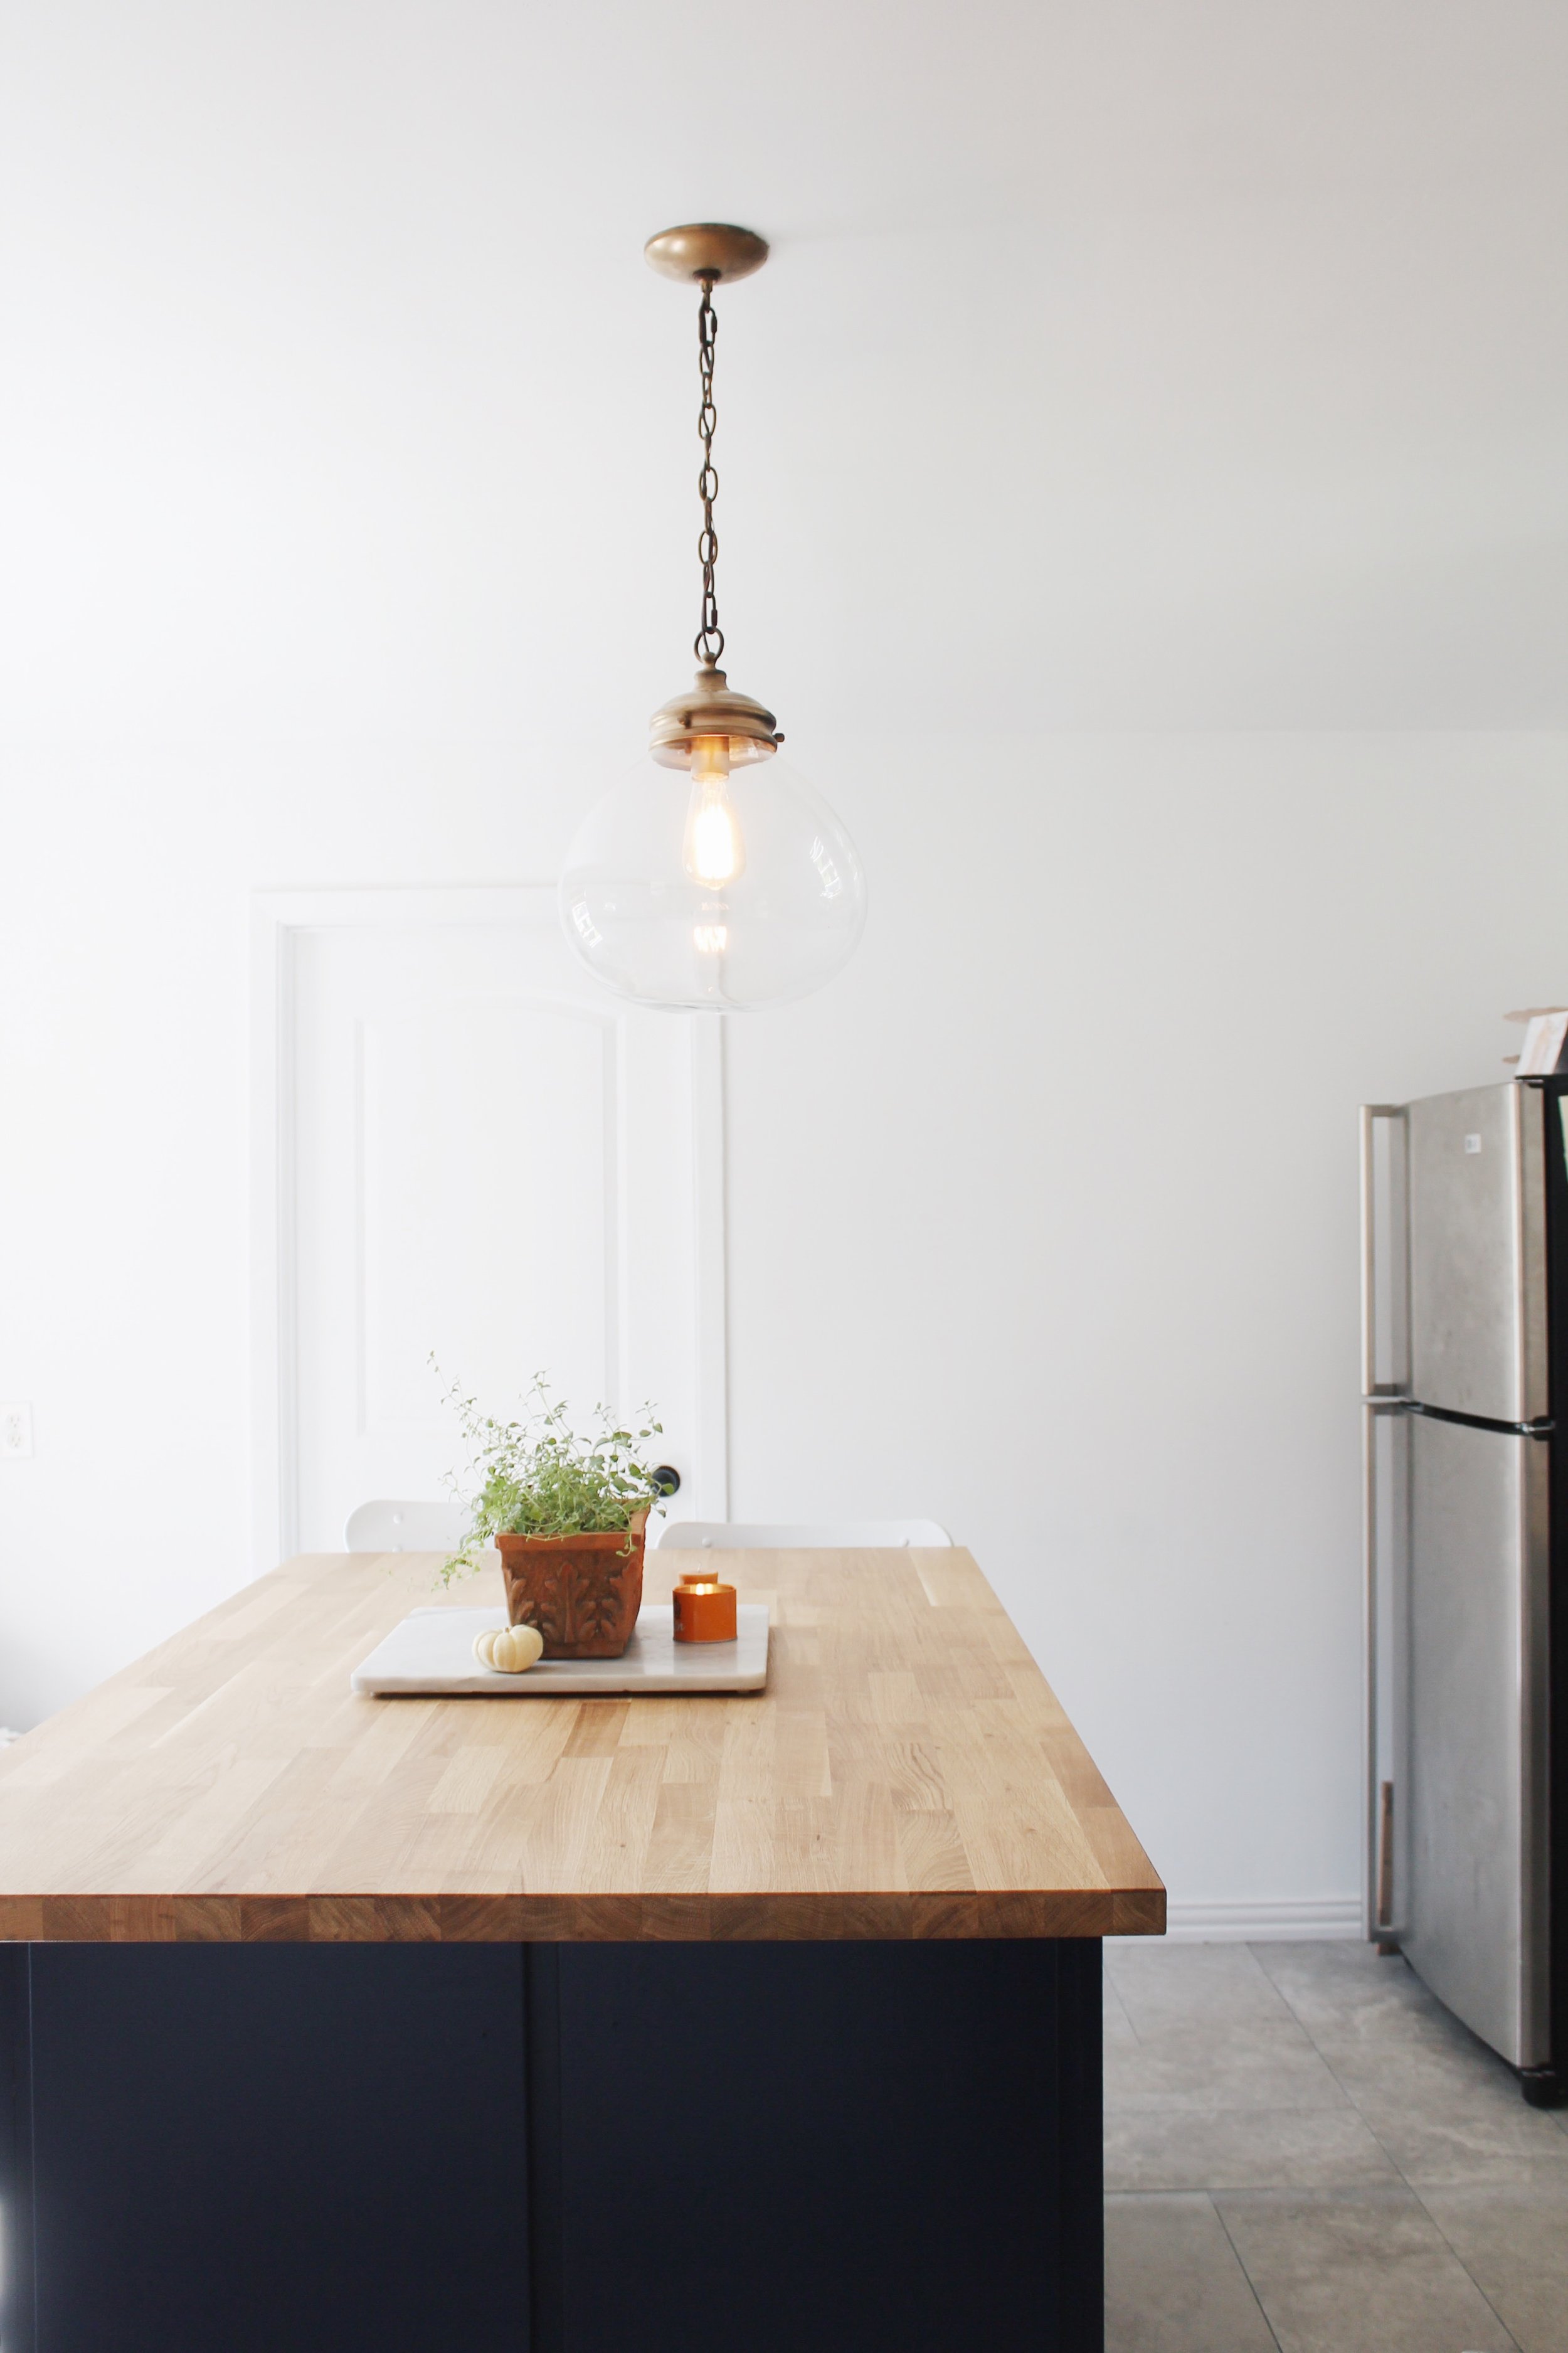
Finally, here is that satisfying side by side before and after! 

Finally, here is that satisfying side by side before and after! 

Sources:

Cabinets: Home Depot Hampton Bay Shaker Cabinets

Hardware: Home Depot: Martha Stewart Pulls Here & Here

Faucet: Home Depot: Moen similar version

Farmhouse Sink: Ikea

Countertop: Ikea Butcher Block 

Back Splash: Home Depot: White subway tile

Flooring: Lowes: American Olean porcelain tile

Stove/Oven: Home Depot: Whirlpool

Dishwasher: Home Depot: Whirlpool 

Floating Shelves Custom Made 


4 Comments
IMG_0195.JPG

Classic Pumpkin Pie

October 23, 2017

Today was wild. I decided to make my first pumpkin pie of the season which I was very excited about. My husband LOVES pumpkin pie. When he was growing up he requested pumpkin pie in place of birthday cake. Luckily, I love it too! Naturally, fall means LOTS of pumpkin pie here. However, today didn't go as usual. I made a beautiful and intricate braided crust. I proudly put it in the oven and sat down to stare at the photos I took of it. I was feeling superrrrr accomplished because it looked perfect. Minutes later my house smelled like a burnt hot dog. The crust somehow slid off the pie and was hanging between the racks. It was burning, dripping, and smoking. I was seriously sweating like crazy struggling to clean it up. Pumpkin juice, now crust, is covering my kitchen, my shirt, and probably my dog. Anyways, I redeemed myself and ended up making a beautiful pie. I resent the pie but it is pretty. 

 I promise I can make an amazing pumpkin pie. I don't have a fancy secret, I love using a good old Libby's can. However, my crust has improved tremendously this season. After years of baking pies I have learned two simple tricks that always ensure amazing, flaky, crust. 

1. MAKE SURE THE BUTTER IS BORDERLINE FROZEN. 

Did you get that? I think the caps helped. 

2. MAKE SURE THE WATER IS SO COLD ITS ALMOST FROZEN. 

I promise you, these two simple things have made my crust worlds better.  

Easy flaky and buttery pie crust: 

PREP: 15 minutes

 TOTAL TIME: 2 hours and 30 minutes

Ingredients:

2 1/12 cups of flour

1 Tablespoon of sugar

1 Teaspoon of Salt

1 cup of VERY cold butter (2 sticks)

6-8 Tablespoons of almost frozen water

In a standing mixer add the flour, sugar, and salt. Mix until fully combined. Cut your butter into small cubes and add to the flour mixture. Mix until the dough looks like coarse crumbs. There should be no major chunks of butter. I have found using the standard mixing attachment works way better than the designated dough hook for this recipe. Add the ice water 1 tablespoon at a time until the dough forms. If it forms into dough before using all of the water thats great! You do not need to use it all. Remove the dough and place onto a surface prepped with flour. Gently form the dough into a ball. Cut the dough in half evenly and press each dough ball into a disk shape. Wrap in parchment paper and refrigerate for at least 2 hours. 

Once the dough has been refrigerated for 2 hours place it on a floured surface to work with. Roll out one of the dough disks completely. I use this first one for the crust. The second dough disk I use for decorations! I do not add the decorations onto the pie right away because pumpkin pie takes a while. I add them on in the last 15 minutes so they do not burn! 

There you have it. The easiest pie crust that is actually good! 

IMG_0198.JPG
IMG_0191.JPG
IMG_0196.JPG
IMG_0197.JPG
IMG_0190.JPG
IMG_0194.JPG
IMG_0193.JPG
Comment

Simple Peanut Butter Cookies

September 23, 2016

Hi there! It has been almost 10 months since I have blogged, that makes me sad. This year so far has been really hard for me. Blogging, and my creativity all together took the back seat to the circumstances in my life. However, I am finally ready to get my creativity flowing and start actively blogging again! I have to because this is what makes me happiest! 

Today is the second official day of Fall so I decided to bake some very simple peanut butter cookies from Smitten Kitchen that I've been dying to try! While making these I thought they would be perfect to do with your kiddos since they are so easy!

You will need:

1 3/4 cups packed light brown sugar

2 large eggs, at room temperature

1/2 teaspoon vanilla extract

1 3/4 cups smooth peanut butter

coarse grain sea salt, to top with 


Preheat the oven to 350˚. Line a rimmed baking sheet with parchment paper. In a bowl whisk together the brown sugar and eggs. Add the vanilla then peanut butter. Whisk until completely smooth and  you can no longer distinguish the peanut butter. Place bowl in the freezer for 15 minutes, mixing once. Once done, scoop with ice cream scoop or spoons onto parchment lined baking sheet. I use a small sized ice cream scoop. Sprinkle balls lightly with coarse sea salt. Bake smaller cookies for 14-15 minutes. If larger bake for 18-20. The cookies are fragile so let them sit on the sheet for a minute or two before they are transferred to a cooling sheet! Enjoy! 

Comment

My FAVORITE BAGEL: The State Street

January 16, 2016

This has been my favorite treat breakfast for as long as I can remember. When I was a kid, I knew it was a good day when my family went out for breakfast at Jack's Bagels. Each of us ordered a State Street bagel with a side of home fries. As we got older, it was also a good day when we went to the grocery store to buy all the stuff to make State Streets. Long story short, I am obsessed with this bagel combo. It runs deep in my blood, my best friend's blood, and now my husband's. Make yourself one of these, and if you are lucky enough to live in Santa Barbara, head to Jack's Bagels and order one - you will not be dissapointed!

You will need:

Bagels ( I like to go for bagels out of a bakery or the fresh baked section in the store. I would avoid bagged generic bagels for this treat.)

Cream cheese ( Use regular, whipped will not cut it!)

Tomato (In my opinion, the firmer the tomato the better.)

Red onion

Lemon Pepper

Directions:

Toast the bagel, smear on gross amounts of cream cheese, assemble the tomato and onion, now cover with TOO much lemon pepper! 

Amen.

Comment

Christmas in Paradise

January 8, 2016

Hi Guys! I have been so MIA from my little old blog because the month of December was crazy! My family moved to Honduras last August. They live on a tiny island off the coast, so as you can imagine there is literally nowhere for my Mom to get my sisters gifts. As the remaining family member in the states, I played the role of Santa this year and ran around like crazy buying stuff for my siblings. After a week in Honduras, Nathan and I immediately flew to Santa Barbara to visit the rest of our family. What a whirlwind couple of weeks! I would do it all over in a heartbeat. I thought I would share some photos of beautiful Roatan, Honduras for your viewing pleasure.   P.S I was having to much fun to use my real camera so I only used my iPhone, oh well! 

Coffee on my mom's deck.

Coffee on my mom's deck.

I am obsessed with this pot at my families house, isn't it just so cool!

I am obsessed with this pot at my families house, isn't it just so cool!

Bathing suit from victoria's secret. 

Bathing suit from victoria's secret. 

my brother actually climed a palm tree for these! we took them home and drank the water for an evening snack!!

my brother actually climed a palm tree for these! we took them home and drank the water for an evening snack!!

We took a tour of the mangroves! 

We took a tour of the mangroves! 

The current was so strong and fast in the mangroves we hopped out of the boat and floated for a while. It seriously felt like a magical lazy river. 

The current was so strong and fast in the mangroves we hopped out of the boat and floated for a while. It seriously felt like a magical lazy river. 

we even found a perfect rope swing! Nathan and jade jumped off the top of those trees too. 

we even found a perfect rope swing! Nathan and jade jumped off the top of those trees too. 

Favorite shades from forever 21!

Favorite shades from forever 21!

My amazing mom and pop. 

My amazing mom and pop. 

It would not be a trip to Roatan without a trip to Bojangles. 

It would not be a trip to Roatan without a trip to Bojangles. 

How gorge is my sister!? What is happening to 14 year olds these days. 

How gorge is my sister!? What is happening to 14 year olds these days. 

Obsessed with my sister in her Mikoh bikini. 

Obsessed with my sister in her Mikoh bikini. 

Comment

Gifts For your BFF!

December 10, 2015

1. I love this print! I saw it the other day and wanted to buy it. It is such a cute reminder that we can do anything we put our minds to! Find it here.

2. Interesting pottery is my current obsession. I love spicing up cute little succulents and plants with interesting geometric pottery. Find this cute one here. 

3. I love little fun gifts that you would never buy for yourself. Does anything sound as dreamy as French Girl Rose Lip Polish? I want some! Buy it here. 

4. Even if I don't write on paper as much as I wish I did, special notebooks give me joy and give me reason to start writing more. These little pocket notebooks are perfect for your globe trotting besties! Find them here.

5. I love the idea of gifts you and your friends can enjoy together. A classic marble cheese board is the perfect gift that will keep on giving! Buy it here. 

6. Rose scent is so luxurious. Nothing is more relaxing than a moisturizing spray before bed. Buy here. 

7. A beautiful book is an heirloom. Especially this one that teaches the lost art of handwritten letters. I absolutely adore the idea of gifting this book. Buy it here.

Tags Christmas gifts, gift guide, anthropologie
Comment

Hand Painted Gift Tags!

December 9, 2015

Whenever I am in Anthropologie, or any shop with paper goods, I'm always drawn to fun wrapping papers, ribbons, and gift tags. If I had it my way, I'd have a room filled with this beautiful stuff and I would wrap the most exquisite gifts. This isn't really an option, so in the meantime I'll stick to making fun wrapping stuff myself. This morning I caught up on The Real Housewives of Beverly Hills and made these fun gift tags. How therapeutic is Lisa Vanderpump, mindless painting, and a side of coffee? Pretty therapeutic if you ask me! This is also something you can easily do with your kids. It's fun, free if you have paint, and ends up looking amazing. What's not to love?

You will need:

  • Paper
  • Paint & Paint Brushes
  • Scissors 

Paint any design you want on your paper. Once the paint has dried cut out rectangles! I think the weirder the design the cooler they turn out! 

Comment

Chocolate Sugar Cookies

December 8, 2015

Sugar cookie season is here! This time of year, I absolutely love making beautifully impressive sugar cookies - remember last years? This year I did something different and made chocolate flavored ones; I can't let myself get predictable here. They were a welcomed change and I think the contrast of dark brown and white is beautiful!

Royal Icing recipe found here.

For cookies you will need:

  • 2 cups of butter at room temperature 
  • 2 cups of sugar
  • 2 large eggs
  • 3 tsp vanilla
  • 4 cups all-purpose flour
  • 1 1/2 cups cocoa powder
  • 1 tsp salt

Instructions:

1. Mix the butter and sugar in an electric mixer. Mix until combined. DO NOT OVER MIX. Scrape down the sides with a rubber spatula and quickly mix what you scraped. For a sugar cookie, it is crucial that the cookie keeps its shape. I learned that over mixing at this step will incorporate too much air, which causes the dough to spread during baking. 

2. Add the eggs and slowly mix.

3. In a separate bowl mix together the flour, cocoa, and salt.

4. Add the flour to the butter mixture. USE your Kitchen Aid's shield. If you do not have one, protect your bowl somehow. Learn from me, my kitchen was COVERED in flour and chocolate. Mix until the dough is stuck to the paddle mixer. Form the dough together in one clump and place onto a piece of parchment paper. Place another piece of parchment on top of the dough. Press it down and roll it out a bit. Refrigerate the dough for an hour. 

5. Once dough is chilled, preheat your oven to 350˚. Roll out the dough further and cut into desired shapes! Cook for 10 minutes. Let cookies cool before decorating. 

Comment

A Few Holiday Cards I Love

December 7, 2015

I LOVE CARDS; I could spend hours in paper shops. I feel that cards are getting so creative these days! Sometimes I even buy cards just to frame. While browsing some of my favorite card spots, I found these that I just love!

1. I love the rich colors and drama in the large long shape! Found here.

2. I am a sucker for all things pink. I love how subtly Christmassy this is. Found here. 

3. I just ADORE these carolers faces. They make me feel happy and remind me of my Christmas play days. Found here.

4. I AM OBSESSED with this idea! This talented woman paints little family portraits. I want one. Found here.

5. This card just makes me feel warm and fuzzy inside. It is so cozy and gives so many feelings. Found here. 

Tags holiday cards, christmas cards, rifle paper co., hand written letters
Comment

Rustic Festive Wall Hanging

December 4, 2015

I am so obsessed with wall hangings these days. I wish I was cool enough or patient enough to learn how to weave beautiful rustic pieces to hang all over my house, but I am not. From now on, I will just admire those who are. Since weaving is not a gift I possess, I made a rustic Christmassy wall hanging that I am pretty much enthralled with. It looks so stunning on my wall, smells amazing, and it was free to make: stick from the backyard, greenery from a nearby Christmassy bush, and some twine. I hope you make one for your house; if you do, show me!

IMG_7199.JPG

You will need:

  • Stick
  • String
  • Scissors 
  • Greenery 

Tie your string to the stick evenly spaced. I found tying the string first made it go much quicker. Once the string is tied, tie on the greenery and you're done! 

1 Comment

How to Cut a Recipe in Half

December 3, 2015

For some reason I am incapable of cutting measurements in half. Whenever I need to, I stand in the kitchen and furiously google how to cut measurements and always get ten different answers. I usually resort to asking Nathan which leaves me still unsure. So here it is what I have always wanted. Save this picture, print it out and let it make your lives easier! 

1 Comment

GIFT IDEA: DIY Brow Sugar Coffee Scrub

December 2, 2015

Hi guys! December is here - it is officially the best time of the year! I say officially because I have been celebrating mentally since early November. Now that Christmas is 23 days away, it's time to start thinking about gifts! Giving is the best part of the season; I am the type of person who begs people to let me give them their gifts weeks in advance. Annoying, possibly yes, but I cannot help it. As much as I would love to go buy all my friends Chloe bags and YSL heels, it just aint in the budget. As we grow up I feel like it's kind of an unspoken bit of common knowledge that sometimes we just can't afford the same gifts we could in the younger years. Thats why little homemade treats are so fun; they're a thoughtful gesture that doesn't hurt your bank account or leave your friends feeling obligated to spend money they don't have on you. I made this scrub because I have been SO CURIOUS about that Frank body scrub thats taken over Instagram. It claims to have so many healing powers but I can never bring myself to order it because it is probably more basic than it claims…..I took some of the main ingredients from Frank and made some myself! It truly did leave my legs feeling like silky clouds and I guarantee any girl would love some scrub to pamper a little bit.  This is such a great gift for a co-worker or bestie that you think deserves a little pampering love! 

P.S. This scrub has so many beneficial properties, literally! I would add a little card noting all the exciting benefits of the scrub!

You will need:

  • 1/2 cup ground coffee (I used the left overs in my espresso machine which required me to make two lattes. Im not complaining - this way it is not a waste!)
  • 1/2 cup brown sugar
  • 1/4 cup coconut oil

Directions:

Mix all the ingredients together! Melt the coconut oil a bit. If its too hard, you can imagine it won't mix. I used an old Pink Himalayan salt jar for my scrub. But I also got a mason jar from the Dollar Tree for only a dollar! This should last about 2 weeks. That is how you know its good, it is fresh without any weird chemicals preserving it! 

Benefits:

COCONUT OIL

  • Moisturizes
  • Rich in antioxidants
  • Natural cleanser

BROWN SUGAR

  • Natural humectant - draws moisture from the environment into the skin.
  • Excellent source of glycolic acid - encourages cell turnover and generates fresher, younger-looking skin.
  • Topical exfoliant – exfoliates dead surface skin and reveals healthy skin underneath.

COFFEE

  • Temporarily reduces appearance of cellulite (!!!). 
  • Exfoliates dry skin making it silky smooth.
  • Calms inflamed and red skin because of antioxidants that protect from premature aging.
  • Stimulating properties of coffee improve blood flow making your skin appear radiant, bright, and alive! 
Comment

Vegan Baked Falafel Balls

December 1, 2015

I have this complex: while eating healthy, it has to be raw food - or I don't think it's healthy. The truth is when you cook your veggies, you're essentially cooking out the nutrients. So, if I am eating veggies, I have this 80/20 rule - 80% of my plate raw and 20% cooked. Of course I don't ALWAYS do this but I really, really try. Since I am often craving the warmth of pizza, pasta, and burgers (just carbs in general), sometimes I NEED extra heartiness and warmth. These falafel balls are DELICIOUS and completely healthy. Essentially nothing goes into them but natural ingredients; they are a total win! I eat mine with hummus, chopped red onion, cucumber, and tomatoes. They leave me satisfied EVERY TIME and Nathan loves them too! 

You will need:

  • 15 oz can of organic garbanzo beans, drained and rinsed
  • 1 white onion finely chopped
  • 3 garlic cloves minced
  • 2 tablespoons oregano 
  • 1 tablespoons fresh chopped cilantro
  • dash of curry seasoning
  • 2 teaspoon lemon juice
  • 1 teaspoon olive oil
  • 2 tablespoons whole wheat flour ( or regular)
  • 1 teaspoon baking powder
  • salt and pepper to taste

Preheat oven to 375˚. Mix garbanzo beans in a food processor and transfer to a bowl. Chop the white onion in the food processor as well and transfer to garbanzo beans. Add the remaining ingredients and mix. Using a small ice cream scoop, form balls and add to a greased cookie sheet. Bake for 15 minutes then turn the balls over cooking for an additional 15 minutes! 

Comment

Simple Christmas Wall Hanging

November 30, 2015

I have this issue where whenever I see cool leaves I have to pick them. I have mentioned this before but I love foraging from this park near my house that has tons of greens. Each week I usually have a piles of greens around my house, poor Nathan. I love to fill corners with vases of greens but since it is the holidays I have been making lots of wreaths, here & here. I love the simplistic pattern of these leaves paired with berries and a simple clean white ribbon.  I connected the leaves by sewing them together with white thread! I used little clear pieces of tape to attach the berries. Worked like a charm. 

Comment

Turkey & Stuffing Sandwich

November 27, 2015

One of the best parts of Thanksgiving is the leftovers. What is better than waddling to the kitchen the next morning and making a heaping plate of carbs? Not much. I do not eat turkey myself but Nathan does, so a post Thanksgiving turkey sandwich is mandatory. According to him, this is the bomb, and based off the ingredients I am sure it is, too. 

You will need:

  • Toasted sourdough
  • Shredded left over turkey
  • Stuffing
  • Gravy 
  • Thin layer of dijon mustard
  • Melted havarti cheese 
  • I would add some cranberries, someone threw ours out! >:o 

Toast the bread in a broiler with butter, then add the ingredients and broil until the cheese is melted! 

Our turkey in all her glory yesterday.

Thomas wanted some pie, but unfortunately we had to tell him no. 

Comment

Super Seed Whole Wheat Bread

November 25, 2015

Like I have mentioned before, I love making Nathan bread. I saw this bag of 'Super Seed & Ancient Grain Blend' - a bag of all the powerful grains such as, chia, flax, hemp, and more. I thought, "how wonderful would it be to make my usual bread with whole wheat flower and all these powerful nutrients?" I love making this bread and slicing it for sandwiches; it's truly divine. This is an easy way to pump some powerful nutrients into your week! What's even better - make some turkey sandwiches on this the day after Thanksgiving!

You will Need:

  • 3 cups whole wheat flour
  • 1 3/4 teaspoons salt
  • 1/2 teaspoon yeast
  • 1 1/2 cups water
  • 1 1/2 tbs Super Seed & Ancient Grain Blend (optional)

In a large mixing bowl, whisk together flour, salt, yeast, and seeds.  Add the water and mix until a shaggy mixture forms.  Cover bowl with plastic wrap and set aside for 12 - 18 hours.  You can also make this bread before you go to bed! It will be ready to cook in the morning!  Pre-heat oven to 450 degrees.  When the oven has reached 450 degrees place a cast iron pot with a lid in the oven and heat only the pot for 30 minutes.  While heating, pour dough onto a floured surface and shape into a ball.  Cover with a towel and let set while the pot is heating.  Remove hot pot from the oven and drop in the dough.  Cover and return to oven for 30 minutes.  After 30 minutes remove the lid and bake an extra 15 minutes.  Once bread is cooked remove from pot onto a cooling rack. This is important because you don't want the bread to cook anymore in the hot pot! 

Comment

DIY Napkin Wrings

November 24, 2015

When Nathan and I go on evening walks I always examine the plants looking for neat greenery. It is the florist in me that's always looking for stuff that would look great in arrangements. I took it to the next level this morning. I was dropping Nathan off at work and violently veered off the road for a bush that had the most beautiful leaves. I "randomly" had scissors in the glove box, so I jumped out and snipped a few branches. I can't get over how fake these leaves appear; they are perfect. I decided to spray them gold and they are just breath taking; it is safe to say I'm OBSESSED. It was so easy, too! All I did was thoroughly spray the leaves then secure them by tying them to the napkin with thin gold ribbon. Easy as can be with a huge impact!  

FullSizeRender-5.jpg
Comment

Holiday Party Ready

November 22, 2015

I hate plans. For some weird reason, knowing I am obligated to something gives me severe anxiety. Even if the plans are good ones, just knowing I HAVE to do it makes me shut down completely. During the holidays I try to commit to very little, so often I have to throw myself together for last minute things. I decided it would be fun to show you how I throw myself together to look Christmas party ready! 

I always start by washing my face and moisturizing it! Also, my hair was needing a serious wash. I sprayed my hair with some dry shampoo and secured into a slick bun. I also clipped in my Bellami extensions to make my bun a little bigger to add some drama.

I start by priming my face with Smashbox Photo FInish Primer. Creating a good base is KEY; we usually take lots of photos around the holidays so this makes for a flawless finish. I next blend Armani Luminous Silk Foundation all over my face using a beauty blender. I love using this foundation because it gives my face a glowy finish. 

I quickly conceal my under eye using Urban Decay concealer then blend with my beauty blender. To define my cheek bones quickly and effectively I swipe NYX Wonder Stick.Then, again, blend with my blender.

I reinforce my contoured cheeks with a little bronzer then highlight my cheek bone with Benefit's Watt's Up! I then quickly swipe my eyelids with some rose gold colored shadow by NYX.

I do a quick cat eye using NYX Felt Tip Liner, however I always use Kat Von D Tattoo Liner. I was just testing out the NYX and I actually like it! Then coat your lashes in whatever mascara you prefer! CoverGirl Lash Blast is my favorite. 

Slap on some red lipstick and you are good to go! I used a revlon lipstick here (I am not sure of the color). I usually prefer a red with more blue, cool undertones because it makes your teeth look whiter! This red is a bit orangey, but it works! All of this took me less than 10 minutes. What is your go-to holiday look?

Tags NYX, Armani luminous silk foundation, red lips, kat von d tatto liner, highlight, bronzer, contour, christmas makeup
Comment

Gold Flatware

November 20, 2015

I have wanted gold flatware for quite some time now, but since we have perfectly functioning silverware, I cannot justify the price. The only reason I want it is because I like the way it looks. I always fish through the thrift silverware bin hoping to literally strike gold but I never have. Since I only care about it for the looks, I decided to spray paint some old silverware for the aesthetic effect! I sprayed these otherwise unattractive forks and knives to display on a shelf in my kitchen. If you are a blogger, these are also great for styling purposes, have fun spraying!

You will need:

  • old silverware
  • blue tape
  • gold spray paint
IMG_6353-3.JPG
4 Comments
Older Posts →
10557433_10152770564398708_284741576561118980_n.jpg

Welcome, my name is Mercedez! My husband Nathan, our little pup Thomas, and I just moved into the country outside of Austin, TX. We purchased our first home and haven't stopped renovating since! Follow along as I share my all of my favorite things in life; recipes, DIY's, beauty stuff, fashion, interior design, and so much more! 

I'm at a point in my life where getting a table runner on sale makes the day worth living.....hahaha Today Id like to be back in Saint Tropez. Everyone go follow my floral design Instagram. Ready, set, go! @theheirloomtable Down by the lake with my love. ☕️ bigger than my face. I need it today. Throwback to the good days at home in California. Sometimes, most of the time, I really miss it. I bought this 10 million dollar water bottle because it looked cool. 😒 Making salsa watching the rain😌 It's 82 degrees and raining. In Texas 82 degrees feels like sweater weather. One more house picture cause I'm loving our new living room. So much brighter and cozier than the last ❤️ I love our throw pillows! My kitchen sink window makes me so happy 😍
 ANTHROPOLOGIE NORDSTROMSFOREVER 21ZARAASOSRAILS


ANTHROPOLOGIE 

NORDSTROMS

FOREVER 21

ZARA

ASOS

RAILS

Powered by Squarespace